Testing angularjs with Jasmine and Karma

Karma is one of the best Test runner suite and mostly created and used by angularJS team. Jasmine is one of the best Behaviror driven testing framework. Jasmine is also dependency free and doesn’t require a DOM.

Today, I am going to show how to test a angular service/factory using Karma and Jasmine.

Requirements
To start with Testing we need some node package needs to be installed. To install the packages run the following commands
– To install Jasmin: npm install jasmine-core
– To install Karma: npm install karma
– To integrate karman with jesmine: npm install karma-jasmine
– To run karma with chrome browser: npm install karma-chrome-launcher
– Finally, we need Karma Command line tools: npm install karma-cli

Let’s assume you have an existing angularJS application. To initialize Karma in your application, run this command:

# karma init

which will drive you through some configuration steps like this:
screen-shot-2017-10-27-at-11-55-48-am

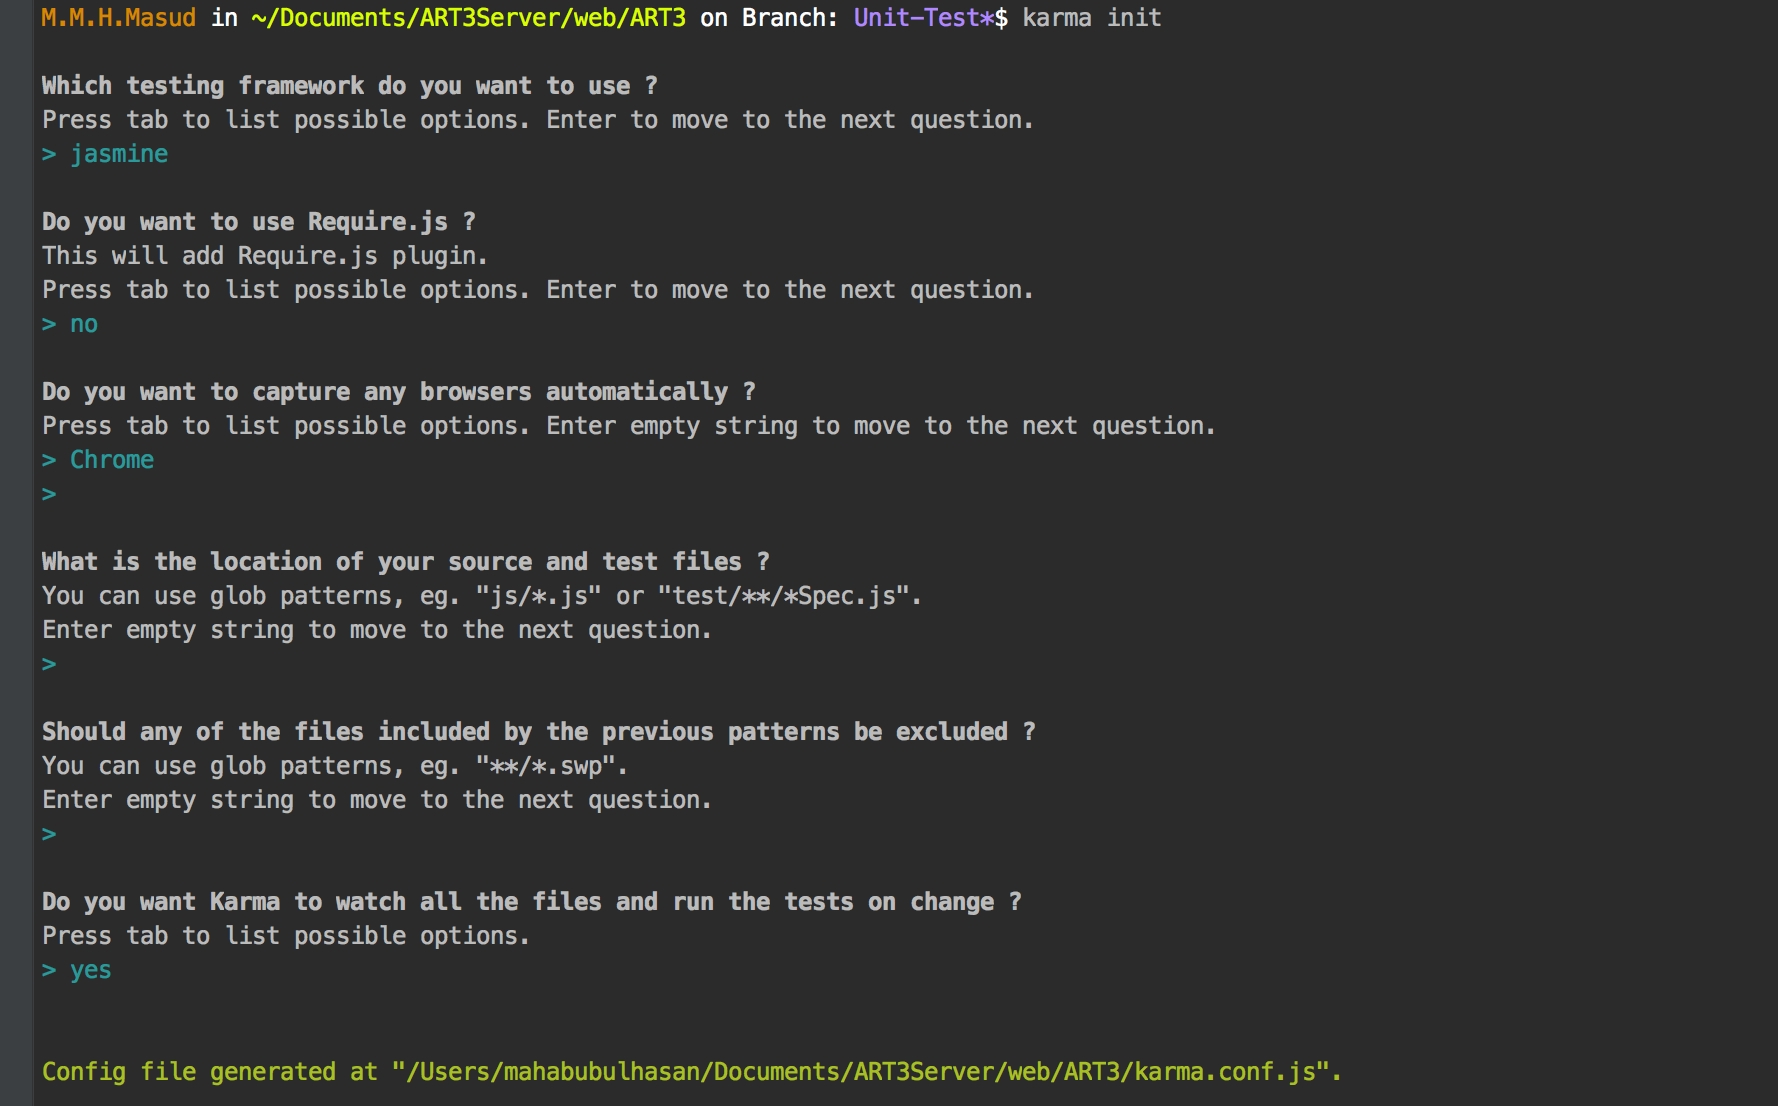
This will generate a file called karma.conf.js with some default settings in your root directory. Now open the file in your favorite editor.

module.exports = function(config) {
  config.set({
    basePath: '',
    frameworks: ['jasmine'], 
    files: [
        './node_modules/js/angular.js', // add this 
        './node_modules/js/angular-mocks.js', // add this
    ],
    exclude: [],
    preprocessors: {},
    reporters: ['progress'], 
    port: 9876,
    colors: true,
    logLevel: config.LOG_INFO,
    autoWatch: true,
    browsers: ['Chrome'],
    singleRun: false,
    concurrency: Infinity
  });
}

Now we are ready for test our application with Karma and Jasmine.

Testing angular service/factory

Lets start our first test code with angular service. Assume that we are about to write our first service userService.js. As TDD means Test Driven Development, we should start with our test file called userService.spec.js

Test File: public\test\app\js\service\userService.spec.js

describe('User Service', function () {
    beforeEach(angular.mock.module('api.users'));
    beforeEach(inject(function (_Users_){
        Users = _Users_;
    }));

    it('should exits ', function (){
        expect(Users).toBeDefined();
    });

    it('has a dummy spec to test 2+2', function (){
        expect(2+2).toEqual(4);
    });
});

Now our test file userService.spec.js is ready to execute. To execute the file, we need to include the files in our karma.conf.js file. Do as follows:

files: [
        './node_modules/js/angular.js', 
        './node_modules/js/angular-mocks.js',
        './public/test/app/js/service/userService.spec.js' //add this line
    ],

Now go to the root directory of your project and run the following command:

# karma start

It will through an error like this, as we don’t have the source file with the module name.
Lets create the source file called userService.js.

Source File: public\app\js\service\userService.js

(function() {
    'use strict';
    angular.module('api.users', []).service('Users', function() {
        //@todo
    });
}());

This time if you run the following command karma start you will see something like this:

screen-shot-2017-10-27-at-11-57-03-am

which means, your service has passed the Test Cases. Congrates…

Help:
To the test coverage report in a meaningful way, do the followings:
1. install the following package npm install karma-spec-reporter
2. change in the karma.conf.js file from reporters: ['progress'], to reporters: ['spec'],
3. now run karma start and you will see something like this:

screen-shot-2017-10-27-at-3-53-20-pmContinue…

Simple Todo List with AngularJS > 1.3

Lets create a simple Todo list using AngularJS > 1.3. Nothing to say, the codes tells a lot. Lets write the code:

Step 01: Create a JS file called app.js and put the following code:

'use strict';

var todoAppliction = angular.module("todoApp",[]);

todoAppliction.controller("todoController", todoController);
todoController.inject =['scope'];

/**
 * Processs an input box enter event
 * Ex: on enter add the task in the list
 */
todoAppliction.directive('ngEnter', function() {
    return function(scope, element, attrs) {
        element.bind("keydown keypress", function(event) {
            if(event.which === 13) {
                scope.apply(function(){
                    scope.eval(attrs.ngEnter, {'event': event});
                });

                event.preventDefault();
            }
        });
    };
});


/**
 * Manage todolist functionality
 */
function todoController(scope){scope.todoList = [];
    scope.isValid = true;scope.totalCompleted = 0;
    scope.totalInCompleted = 0;scope.filterBy = 'all';
    
    
    scope.addTodoItem = addTodoItem;scope.removeTodoItem = removeTodoItem;
    scope.getStatus =  getStatus;
    
    
    function addTodoItem(){scope.isValid = isValid();
        if(!scope.isValid) {
            return false;
        }scope.todoList.push({
        	id: 'id_' + (new Date()).getTime(),
            name: scope.task_title, 
            completed: false, 
            createdDate: (new Date())
        });scope.task_title = '';
    }
    
    function removeTodoItem(index) {
    	scope.todoList.splice(index,1);
    }
    
    function isValid() {
    	return (scope.task_title != null && scope.task_title != undefined &&scope.task_title != "")
    }
    
    function getStatus(isComplete){
        var count = 0;
    	angular.forEach($scope.todoList, function(item){
			if (isComplete && item.completed) {
                count++;
            }else if (!isComplete && !item.completed) {
                count++;
            }
        })
        return count;
    }

}

Step 02: Create the template index.html and put the following code inside it:

<body>
    <div ng-app="todoApp" ng-controller="todoController">
        <div class="task-input">
            <input type="text" ng-enter="addTodoItem()" id="task-input-box" placeholder="enter task title" ng-model="task_title"/>
            <button type="button" name="add-task" id="add-task" class="button" ng-click="addTodoItem()">
                + Add 
            </button>
            <br/>
            <div class="error-mg" ng-show="!isValid">Please enter a title</div>
            
            <div id="filterOptions">

                <input type='radio' ng-model="filterBy" value="all"/> All ({{todoList.length}})
                    <input type='radio' ng-model="filterBy" value="complete"/> Complete ({{getStatus(true)}})
                        <input type='radio' ng-model="filterBy" value="incomplete"/> Incomplete ({{getStatus(false)}})
                    
            </div>
        </div>


        <div class="todo-list">
            <ul>
                <li ng-repeat="todo in todoList track by todo.id"
                    ng-show="(filterBy=='all') || (filterBy=='incomplete' && !todo.completed) || (filterBy=='complete' && todo.completed)"
                > 
                    <input type="checkbox" ng-model="todo.completed"/>
                    <span ng-class="todo.completed ? 'complete': 'incomplete'">{{todo.name}} </span>
                    <a href="#" ng-click="removeTodoItem($index)">remove</a>
                </li>
            </ul>
        </div> 
    
    </div>
</body>

Step 03: Style it with CSS in style.css

.task-input{
    padding: 10px;
    background-color: #4072B4;
    color:white;
    font-family:verdana;
    font-size: 12px;
}

.task-input input[type=text]{
    border: 1px solid white;
    padding: 10px;
    font-size: 15px;
    border-radius: 3px;
    width: 280px;
}

.button{
    padding: 11px 15px;
    font-size: 13px;
    border-radius: 3px;
    border: 1px solid white;
    background-color: #3267C6;
    color:white;
}

.error-mg{
    color:red;
    font-size:12px;
    text-align:left;
}

.complete{
    text-decoration:line-through;
    color:#999;
}

.todo-list{
    margin: 15px 0px;
}

.todo-list ul{
    padding:0;
    margin:0;
}

.todo-list ul li{
    list-style:none;
    padding: 0;
}

.todo-list ul li span{
    width: 320px;
    display:inline-block;
    vertical-align:top;
}

#filterOptions{
    margin: 10px 0px;
}

That’s it. Enjoy and play with Todo list

Next: we will store the list in MongoDB and Categories Todo Item.

MEAN Stack 01: Preapare development enviroment

This is going to be series of article on MEAN stack. Start with setting up development environment with the following the tools

Introduction to Vagrant

Vagrant is computer software that creates and configures virtual development environments. It can be seen as a higher-level wrapper around virtualization software such as VirtualBox, VMware, KVM and Linux Containers (LXC), and around configuration management software such as Ansible, Chef, Salt, and Puppet.

Windows

  • Install Vagrant
  • Create a vagrant script named vagrantfile
    Vagrant.configure("2") do |config|
      
      // this is the box name
      config.vm.box = "ubuntu/trusty64"
      
      // provision script from a separate file
      config.vm.provision :shell, path: "bootstrap.sh"
    
      //forward the apache port to host machine with a  different port
      config.vm.network :forwarded_port, guest: 80, host: 1001
    
      //forward the nodejs port to host machine with a different port
      config.vm.network :forwarded_port, guest: 8001, host: 8001
    
      //share folder between host and guest machine
      config.vm.synced_folder "/Users/vagrant/helloworld", "/vagrant"
    end
  • Run Vagrant Machine with Ubuntu 14.04
    # vagrant up
  • Adding SSH key access to vagrant machine (using PPK file)
    • Install Putty and Putty Gen
    • To generate PPK (Putty Private key), open puttygen
    • Select import private key from the menu
    • show the path of the private key generated by vagrant, default at 
      YOUR_BOX_LOCATION\.vagrant\machines\default\virtualbox\private_key
    • Click the save private key button and save the file in the same location where the default vagrant private key located.
  • SSH to Vagrant Machine (putty, puttygen)
    • Open putty program
    • add the host name in hostbox, default is: 127.0.0.1
    • add the port number, default is: 2222
    • name the settings: testVagrant
    • for authentication, from left sidebar look for auth options and select that. left side you will see the option to browse the path of the PPK file.
    • Now click open and it will ask for login user name. Default user is: vagrant
  • Running the Vagrant from host machine
    • Install Apache Web Server using Ubuntu package manager (APT- Advanced Packaging Tool)
      # Sudo apt-get update
      # sudo apt-get install apache2
    • Forward port from guest machine to host machine using Vagrantfile configuration
  • Setup Vagrant Provisional items
    • Add Apache web server in bootstrap.sh
      #!/usr/bin/env bash
      
      # install apache2 server
      apt-get update
      apt-get install -y apache2
      if ! [ -L /var/www ]; then
        rm -rf /var/www
        ln -fs /vagrant /var/www
      fi
    • Add node package into the server
      # install node package
      apt-get install -y g++
      curl -sL https://deb.nodesource.com/setup_0.12 | sh
      apt-get install -y nodejs
      su vagrant
      mkdir /home/vagrant/node_modules
      cd /var/www/
      ln -s /home/vagrant/node_modules/ node_modules
      npm install karma
    • Create and Run First node.js server
      var http = require('http');
      var server = http.createServer(function (request, response) {
          response.writeHead(200, {"content-Type": "text/plain"});
          response.end("Hello Node World\n");
      });
      
      server.listen(8001);
      console.log('Server running at http://127.0.0.1:8001');
  • Mac
    • Install Vagrant
    • Create a vagrant script

Series:

MEAN Stack 01: Prepare development environment

MEAN Stack 02: mongoDB installation with provision and starting with mongodb

MEAN Stack 03: How to work with mongoDB

MEAN Stack 04: Start with Express framework using nodejs