Install CasperJS in windows 7

Following things/steps help me to install and run casperjs on my windows machine properly:

Requirements:

Node Package Manager
PhantomJS

step 01: Install node package manager by following this simple 4 min video

step 02: Install phantomJS using the following command

npm install phantomjs2

Check this link for more details.

step 03: Run the following command 

npm install casperjs

To get the phantomjs and casperjs module in command line, add this to windows bin path. To edit the bin path follow this:

  1. Right click on my computer and click on `Properties`
  2. go to `advanced system settings`
  3. click `Enviroment variables`
  4. from system variables section, select `path` and click on `Edit`
  5. now add caseperjs and phantomjs path like this at the end of path variable:
;C:\WINDOWS_GLOBAL_NODE_MODULES_PATH\casperjs\bin;C:\WINDOWS_GLOBAL_NODE_MODULES_PATH\phantomjs\bin

where `WINDOWS_GLOBAL_NODE_MODULES_PATH` = Your machine node modules path.
6. To get this path run

npm list -g

First line of the command output is the path.

Now you are all set and check the casperjs command in command line.

1-casper

Note: NPM is the best tool for javascript based development. so once you set it up, every new thing is easy to setup.


Some useful articles for nodeJS, Express, Angular and MongoDb

I was reading some blog post over the last weekend and found some good article on NodeJS, Express, Angular (not angular2) and MongoDB. I think it could be helpful for others:

All this articles are published on http://adrianmejia.com/ site.

REST service authentication using jsonwebtoken

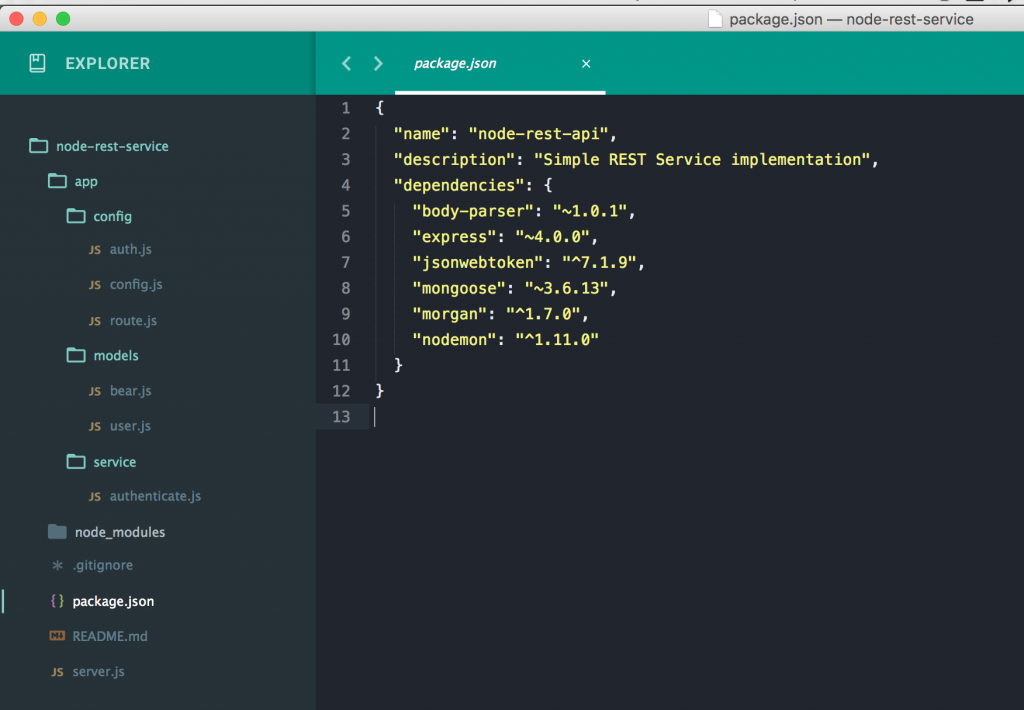
In my last tutorial, we have gone through REST service creation using nodeJS and MongoDB. In this tutorial we will show, how to make token based authentication using jsonwebtokenwe will use mongodb for user login information.

Lets install the jsonwebtoken module using the following command:

npm install jsonwebtoken --save

“–save” option will add this module in package.json for future installation.

Now add this module to the server.js file in the following way:

jwt = require('jsonwebtoken'),

Now lets create a user model  so that we can verify user. Create a user.js file under app/models folder and put the following contents in it:

var mongoose = require('mongoose'), 
    Schema = mongoose.Schema;

var UserSchema = new Schema({
    name : String, 
    password : String, 
    admin : Boolean
})

module.exports = mongoose.model('User', UserSchema);

Now, let’s proceed to the authentication process. Authentication consists of two steps:

  1. Login with Username and password
  2. verify the authentication before each request

To make the authentication we will create a Service called authentication.js under app/service folder and put the following code. FYI, this is modular class which will expose two methods. One for check login and another one for verify login before is each request.

var User = require('../../app/models/user'),
    jwt = require('jsonwebtoken'),
    auth = require('../../app/config/auth');

var authenticate = (function (){
    /**
     * @method checkLogin
     * @description check login with user name and password 
     */
    var checkLogin = function (username, password, response) {
        User.findOne({name : username}, function (err, user) {
            if (!user) {
                response.json({
                    success: false, 
                    message : 'Authentication failed. User not found'
                });
            } else if (user) {
                if (user.password != password) {
                    response.json({
                        success: false, 
                        message : 'Authentication failed. User/Password not found'
                    });
                } else {
                    var token = jwt.sign(user, auth.secret, {
                        expiresIn : 1440 // expires in 24 hours
                    });

                    response.json({
                        success: true,
                        message: 'Authentication Success! Enjoy your token',
                        token : token
                    });
                }
            }
        });
    };

    return {
        checkLogin : checkLogin
    };

}());

module.exports = authenticate;

To verify the login before each request, we need to have a method first. Create the following method inside the authenticate module in the following way:

.......................................................................
/**
     * @method isLoggedin
     * @description check login with user name and password 
     */
    var isLoggedin = function (request, response, next) {
        var token = request.body.token || request.query.token || request.headers['x-access-token'];

        if (request.url === '/authenticate' || request.url === '/setup') { //if try to login, avoid token check
            next();
            return false;
        }
        
        if (token) {
            jwt.verify(token, auth.secret, function (err, decoded) {
                if (err) {
                    response.json({
                        success: false,
                        message : 'Failed to authenticate token'
                    });
                } else {
                    request.decoded = decoded;
                    next();
                }
            });
        } else {
            response.json({
                success: false,
                message : 'No toekn has provided'
            });
        }
    };
.......................................................................

Now expose this method as public in the following way:

.......................................................................
return {
        checkLogin : checkLogin,
        isLoggedin : isLoggedin
    };
.......................................................................

Now we have to update route.js file. We use the following route, which will verify the login, before serving the content to that particular request URL. To do that add the following code in route.js file:

var express = require('express'),
    Bear = require('../../app/models/bear'),
    User = require('../../app/models/user'),
    jwt = require('jsonwebtoken'),
    auth = require('../../app/config/auth'),
    authService = require('../../app/service/authenticate'),
    router = express.Router();

router.use(function(req, res, next){
    console.log('Something is trying to reach at ', req.url);
    authService.isLoggedin(req, res, next);
});

// make the authentication request
router.post('/authenticate', function (req, res) {
    authService.checkLogin(req.body.name, req.body.password, res);
});

//rest of code 
.......................................................................

Now try to get list of bear from GET http://www.localhost:8080/api/bears using postman

screen-shot-2016-10-19-at-8-29-57-pm

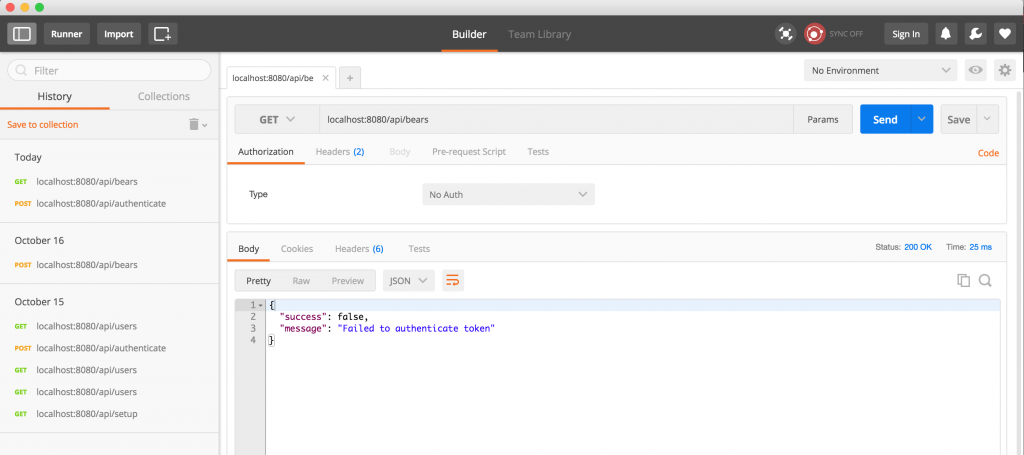
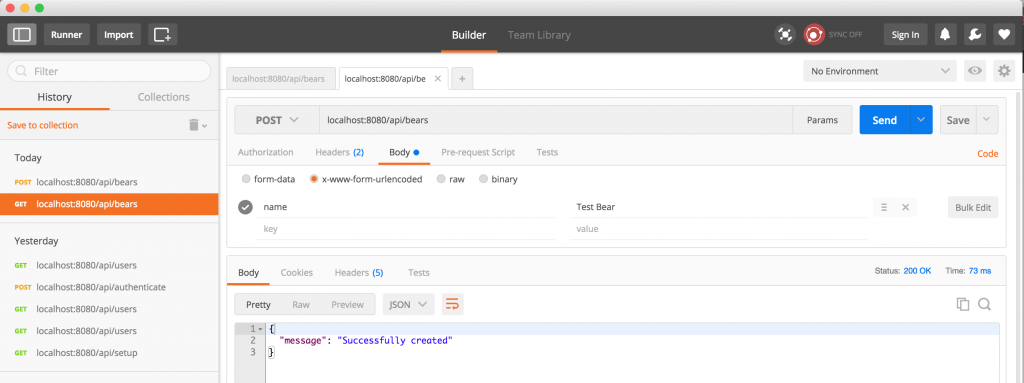
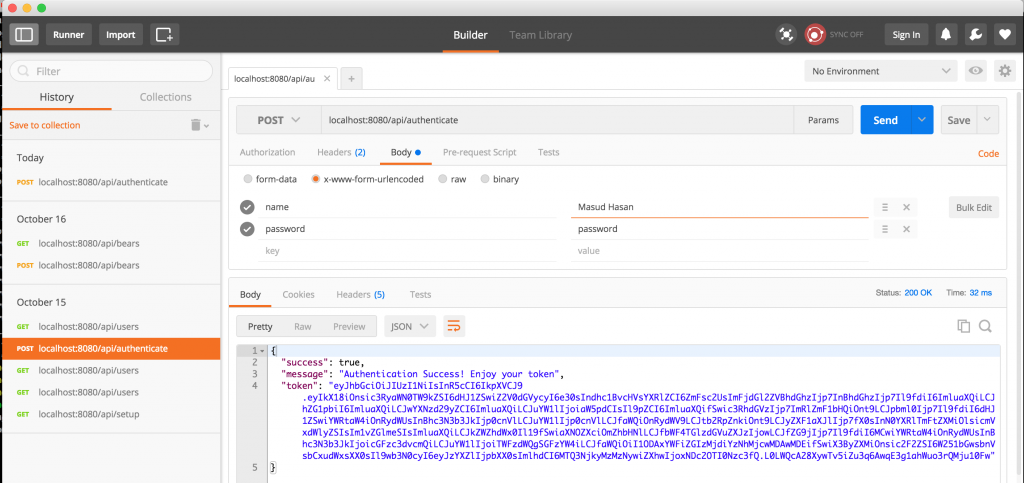
Now it will through an error because authentication token is not available. Now Lets login or authenticate a user and get the token. Check this :

screen-shot-2016-10-19-at-8-29-10-pm

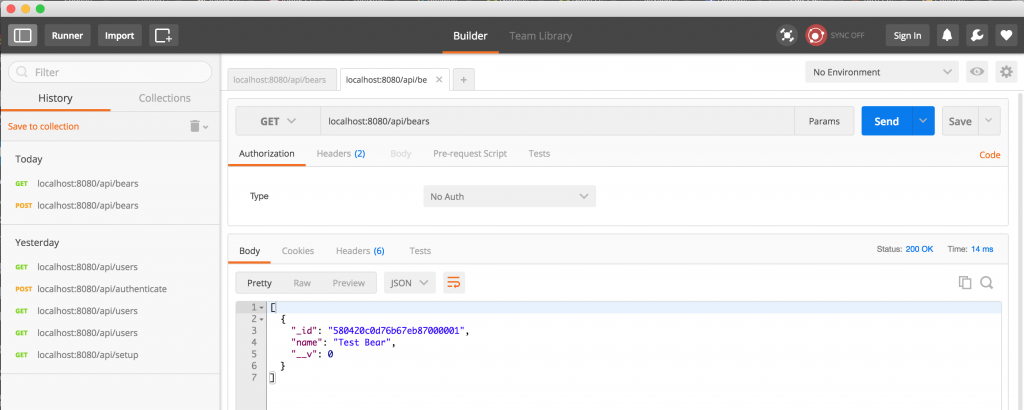
Now copy the token and put it in the GET request header like this way:

screen-shot-2016-10-19-at-8-30-33-pm

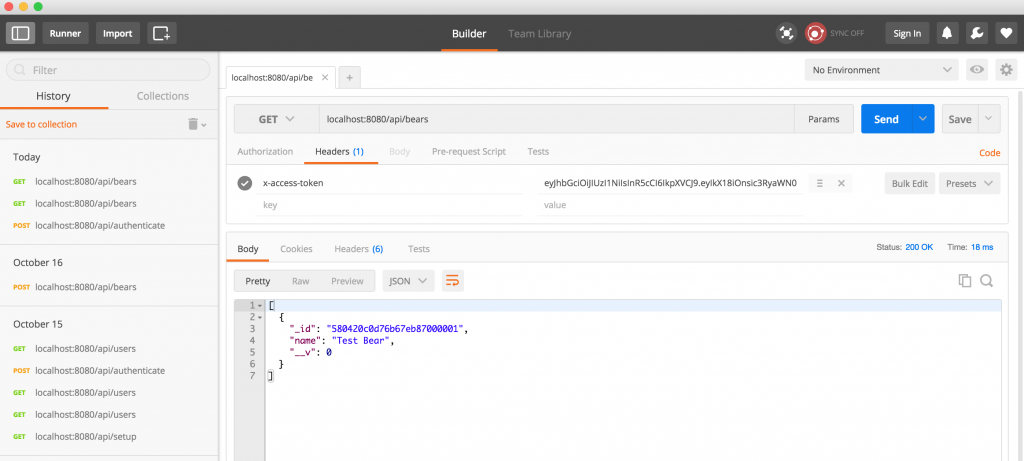
Now you will see the list of bear because Authentication token was passed as an header.

Hope you enjoy the process step by step. More will be added soon….


Create Node Server with Express & MongoDB [part-2]

If you miss the previous post, you can check it from here Create Node Server with Express & MongoDB

Step 5: Verify mongodb connection with a new collection (Save & Find)

Lets create a db model file under app/models. Lets called the file name bear.js and put the following content into the file:

var mongoose = require('mongoose'),
    Schema = mongoose.Schema;

var BearSchema = new Schema({
    name : String
});

module.exports = mongoose.model('Bear', BearSchema);

To use this model, we need to include it into the server.js file. But our purpose is to save some data into mongodb server and query the content. For that we need to define some ROUTE. To do that, let’s create a file called route.js under app/config folder and put the following content into the file:

var express = require('express'),
    Bear = require('../../app/models/bear');

/**
 * To insert data on POST method
 */
router.post('/bears', function (req, res){
    var bear = new Bear();

    bear.name = req.body.name;
    bear.save(function (err){
        if (err) res.send(err);
        res.json({message: 'Successfully created'});
    });
});

/**
 * To get all data on GET method
 */
router.get('/bears', function(req, res) {
    Bear.find(function(err, bears){
        if (err) res.send(err);
        res.json(bears);
    });
});


module.exports = router;

Now to access the url, we need to include the route.js file in server.js file in the following way:

.......................................
router = require('./app/config/route'),
.......................................

again, to maintain better REST url, we add a prefix ‘api’ to each route for the app. To do that add the following line:

............................
app.use('/api', router)
............................

Now you can access the url like this:

//To Save data
POST http://localhost:8080/api/bears

//To get all data
GET http://localhost:8080/api/bears

Lets try to access the url using postman chrome extension:

First add a data with POST url:

screen-shot-2016-10-16-at-8-52-22-pm

Now get the data using GET url:

screen-shot-2016-10-16-at-8-52-43-pm

Create Node Server with Express & MongoDB

This tutorial will describe how to create a node server with Express Framework and MongoDB database. To start, let take a look at the prerequisite

  • NPM – node package manager
  • MongoDB

Step 01: Create a folder called “node-tutorial”. Inside the folder create a new file called “package.json”. Add the following contents to the file:

{
  "name": "node-rest-api",
  "description": "Simple REST Service implementation",
  "dependencies": {
    "body-parser": "~1.0.1",
    "express": "~4.0.0",
    "mongoose": "~3.6.13",
    }
}

now run the following command to install the dependencies:

npm install

This will create a local node_modules folder where it will install all the dependencies.

Step 02: Now create some directory in the following format. For now just create the folder, ignore the files inside the folder.

screen-shot-2016-10-15-at-8-39-30-pm

Step 03: create a node server 

Let’s create a node server. To do that, create a file in to the root folder called “server.js”. Put the following contents into file:

var express = require('express'),
    app = express(),
    bodyParser = require('body-parser');

var port = process.env.PORT || 8080;


app.use(bodyParser.urlencoded({extender: true}))
   .use(bodyParser.json())
   .listen(port);
   
console.log('Magic happens on port ', port);

Now execute the following command to run the server

node server.js

You will see the following screen in the terminal:

screen-shot-2016-10-15-at-8-45-59-pm

Congratulations, your first node server is running at port 8080.

Step 04: start mongodb server and connect from NodeJS server

First start the local mongodb Server using the following command

masud-hasan@C02RH1S1G8WM ~> mongod

2016-10-15T00:00:04.089-0400 I CONTROL [initandlisten] MongoDB starting : pid=9862 port=27017 dbpath=/data/db 64-bit host=C02RH1S1G8WM
2016-10-15T00:00:04.089-0400 I CONTROL [initandlisten] db version v3.2.5
2016-10-15T00:00:04.089-0400 I CONTROL [initandlisten] git version: 34e65e5383f7ea1726332cb175b73077ec4a1b02
2016-10-15T00:00:04.089-0400 I CONTROL [initandlisten] OpenSSL version: OpenSSL 1.0.2g 1 Mar 2016

once you run the mongodb sever, it will start on default mongo port at 27017.

Now lets connect it from our app. Create a config.js file under app/config location and put the following content into the file:

var mongoose = require('mongoose');

mongoose.connect("mongodb://localhost:27017/nodetutorial");
module.exports = mongoose;

Here we are connecting to mongodb sever using mongoose module. Here we are creating a new mongodb schema called “nodetutorial”.

To get the mongo connection available through the application, let’s include the file in the server.js file in the following way:

var express = require('express'),
    app = express(),
    bodyParser = require('body-parser');

var mongoose = require('./app/config/config.js'),
    port = process.env.PORT || 8080;


app.use(bodyParser.urlencoded({extender: true}))
   .use(bodyParser.json())
   .listen(port);
   
console.log('Magic happens on port ', port);

Now execute the following command to run the server

node server.js

if you don’t see any error then you are successfully able to connect to the mongodb server from node server.

Step 05: Verify mongodb connection with a new collection (Save & Find)

coming soon…..